

How To Repair Exhaust Manifold Gasket Leak
Replacing the exhaust manifold and gasket on a VAZ 2114
The exhaust manifold is a unit that is responsible for the ride quality, without which comfort is impossible. This is the silence and the absenteeism of the smell of frazzle nether the hood, which can be drawn into the cabin through the opening of the motel filter. Elimination of leaks in the exhaust manifold of the VAZ 2114 - necessary repairs. Fortunately, it is not urgent, y'all tin can prepare in advance and cull a user-friendly moment.
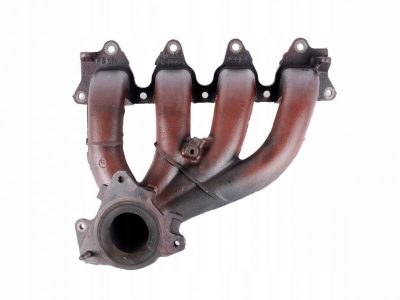
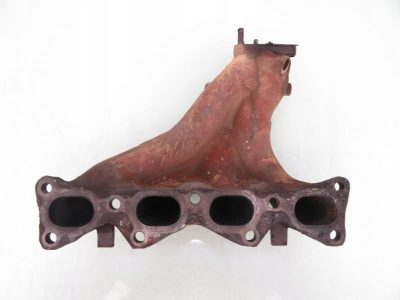
Exhaust manifold for VAZ 2114
Causes of malfunctions
The primal gene that is the cause of 90% of exhaust manifold malfunctions on VAZ 2114 cars is the high temperature and not the best quality materials from which the parts are made. During operation, the steel heats upward and cools down many times, which leads to the advent of cracks on the trunk. This is a frequent miracle for VAZ cars older than seven-8 years.
Automobile repair shops offer services of welding cracks with argon welding. Yet, for a number of reasons, this activity is useless for a car over 7 years former.
1) Simply removing and installing the exhaust manifold volition cost nearly 2,five one thousand rubles. Taking into account the work of the welder and other actions, the price of repairs can be 4-5 k rubles. If you exercise the work yourself, buying a new part will be cheaper.
2) Welding, even argon, violates the structure of the "tired" metal. A cooked part rarely lasts longer than a year, after which new holes appear. The older the car, the faster the problem returns, and the collector has to exist removed again.
If the car is over viii years old and at that place are problems with cracks in the manifold, it is better to remove the part and supercede it with a new 1.
Symptoms of malfunctions
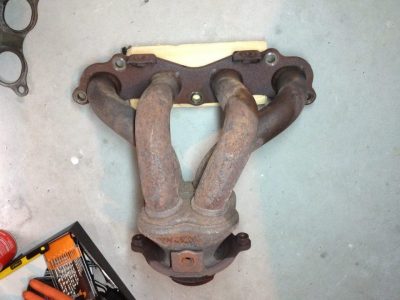
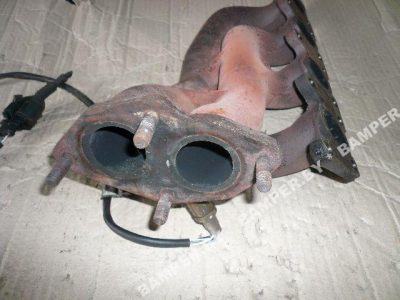
Exhaust manifold gasket
One of the main signs of a leak in the organisation is a "sporty" growling sound when the engine is revving up. This can be a symptom of diverse frazzle organization malfunctions. To check, it is ameliorate to take an assistant and go to a garage with a pit or to an overpass. Most oft, you lot can tell by eye whether the problem lies in the muffler, resonator or exhaust.
The wear of the gasket can manifest itself during the manufacturing procedure. Open up the hood and start the car - white or grayish smoke that rises from the manifold during warming upwardly indicates a leak for this reason. Owners of VAZ cars commonly face up this problem every three-4 years. When using depression-quality spare parts before. The solution may be to manufacture a steel gasket to social club. It tin concluding as long as the entire collector.
Service specialists, attracting customers, similar to tell scary stories about the explosion of the exhaust manifold on VAZ 2114 cars due to cracks. In reality, this is goose egg more than than a myth. Merely the existent issues are no less serious, so information technology is not worth putting off repairs in a distant box.
A cracked exhaust manifold or a worn gasket can cause the engine to run muddy.
1) A lambda probe is installed in the exhaust manifold, which affects the operation of the injection system. Strong air leakage violates the mass oxygen content in the frazzle, the lambda incorrectly adjusts the quality of the mixture, causing triple formation, uneven idling, loss of power, "blackness" candles.
2) Another part is crankcase ventilation. Violation of air circulation causes irregularities in the operation of the gas distribution mechanism, increased vesture of valves, the formation of carbon deposits on the pistons and other "joys".
If increased noise and unpleasant odors during engine operation are combined with muddy work, the car needs urgent repair.
Tool and necessary parts
To remove the exhaust manifold on a VAZ 2114 in guild to replace the gasket or the whole part, yous will need the post-obit tool:
- open-end and cap keys for 8, 10, 13, 17;
- key with heads 17, 19;
- screwdrivers, pliers.
Information technology is also advisable to have tools such as a dremel, nut cutter or nut cutter on manus. Every bit a rule, the fasteners on the parts of the frazzle organization stick tightly.
A few days in advance of a planned repair, begin lubricating the available WD-twoscore nuts or other penetrating lubricant. Repeat the operation ii-3 times. This volition slightly simplify the task of removing the manifold..
The question often arises: is it worth using a sealant later removing and replacing the gasket. Experts believe that if you smear the gasket with a sealant, then only high-quality silicone. A bad sealant can bring a lot of troubles to the VAZ 2114 engine: when it burns out, it turns into "pellets" that information technology pulls into the crankcase. And this is unnecessary contamination of the piston organization.
Frazzle manifold removal process
Think 7 times before removing the exhaust manifold yourself. It is non cheap to do this work in the service, but the inaccessibility and difficulty of loosening some of the basics tin be a serious trouble.
Nosotros unscrew the bolt fastening to the intake piping
It is important to bleed the coolant prior to removal, as antifreeze tin can enter the cylinders during the process. The sequence of actions for vehicles with an injector is every bit follows:
- Disconnect the battery, release the throttle cable from the throttle valve.
- Disconnect the fuel lines.
- Disconnect the wires from the TPS and the idle speed controller.
- Release hoses for crankcase ventilation, vacuum, brake booster.
- Remove the receiver, remove the injector block wires and remove the injector fuel rails.
- Remove the bracket and thermal shield.
- After that, you can disconnect the front pipe, exhaust and intake manifolds from the manifold.
All gaskets are replaced with new ones afterward parsing. Please note when buying that the exhaust manifold gaskets for 8-valve and 16-valve VAZ 2114 are different. Choose the parts advisedly, and you tin can avert wasting time and money.
A source: https://NaDomkrat.ru/vyhlopnaya-sistema/vypusknoy-kollektor-vaz-2114
How To Remove Exhaust Manifold On BMW E39
Exhaust gasket manifold BMW E39
- published on: 1/xix/2016
- Video fourth dimension: 00:02:39
- Study a problem with video playback
(15)
Dearest visitors of the site "Cars"! We volition exist very grateful for the video clip Exhaust manifold gasket BMW E39», You practise not demand to register for this, please let the states know if in that location are any issues with video playback.
Information technology is true that it is best to lubricate the studs with a copper based grease when assembling. So, if you demand to re-disassemble, will they non be on the edge? And if this is non the case, is it worth information technology at all to lubricate something and what exactly? Give thanks you lot.
Adept afternoon. In our feel, whatever lubricant will burn, so nosotros just lubricate it.
and so you at least bear witness me how to do it, thats all, i broke the pump generator of the saddle-geysel gazelle, drilled, sawed and went crazy drilling the 7th drill, went through 8 borer holes, then the pump
Fuck your ass with a video consultation
How much is the assembler going to evangelize the engine ha Mazda titanium
When assembling, millet grease helps to tighten with normal force. And the lubricant filler is already working afterwards. Graphite is a skillful filler for such substances. Those. schedule. Copper filler is harmful as galvanized copper steel will simply speed up the fill.
WD-xl adheres better to a piece of rag and wraps that piece around each nut. Less speedily, just more deeply and qualitatively, reagents help: 1. Vinegar 70 2. Citric acid 3. Phosphoric acid in aqueous course and normal concentration. In WD-twoscore, it is quite sensitive. The best option because it phosphatizes and protects the bare iron.
Better nevertheless is the reaction of the anode. We also hang a rag and on it an electrode that fumbles.
Removing intake manifold BMW m52tu / m54
Remove the intake collector motor BMW to supersede the cooling tube. Symptoms: The motel smells.
Removing the intake manifold in BMW E39 M57 (part one)
In this video I will show you how to remove the intake manifold correctly and with the least loss and risk.
How did I unscrew the broken pivot under the root? cut the thread in the hairpin and screw the bolt in there until it stops and starts twisting information technology with the broken hairpin
To go along nothing from getting stuck, use copper nuts and you will be happy.
Hi. I'm a locksmith myself. I work for a company. And it won't drill and intermission the pigsty. We RESANTA have long been accustomed to the fact that I practise non know how to cook, at present I, at least, stayed a little. Later removing the manifold, disconnect the battery terminals, shut the exhaust holes, take a weld, a nut of about the same bore or slightly larger so that the droppings of the stud tightly with pliers and weld it through the hole in the nut to the stud.
Give some cold welding, have the wrench and shake gently to unscrew. This happens the first time information technology doesn't piece of work. The nut volition autumn if information technology is not caught well. Try over again. Well, if in that location is no welding, then yes, you need to drill. Just for me, welding is but super. Personally verified. Always goes with a bang. And the thread is intact. And when heated later welding, it normally goes well. But it's better to milk shake it so equally not to rip off the nut.
Retrieve to fix a burn extinguisher before welding
There is graphite powder. If you accept that 70 vinegar away, trust the knives on the icebreaker a year after the ocean is spinning, locksmith luck. Not to load or intermission, you just need to warm it up
Practiced video, everything is articulate. 100 guarantees no jerks:
You tin make small flaming grains with a nut and unscrew it.
If the nut burns out by a size or 2, ZUBILO Avatar comes to the rescue
A source: https://avto-melvin.ru/kak-snjat-vypusknoj-kollektor-na-bmv-e39/
How to remove the exhaust manifold on a VAZ-2114 viii valve injector
The exhaust system of a VAZ-2114 auto with an injection engine is not especially difficult, nevertheless, sometimes you lot have to spend enough fourth dimension, and maybe money (if you bear out piece of work at a service station) to bring it back to normal. Today we will deal with the VAZ-2114 frazzle manifold, with the features of its dismantling and installation.
When yous need to supercede and remove the exhaust manifold on the VAZ-2114
Huge temperature swings are the main problem faced by the frazzle manifold and the gasket for which information technology is removed. The collector itself is fabricated of special grade cast iron, information technology can withstand loftier temperatures (up to 800-900 degrees), nevertheless, these are critical values, later which the collector tin can warp or crack.
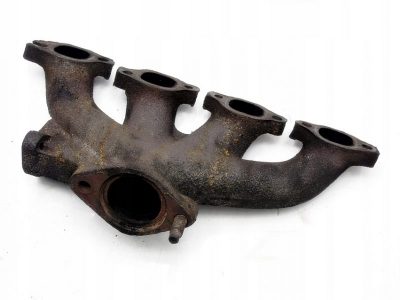
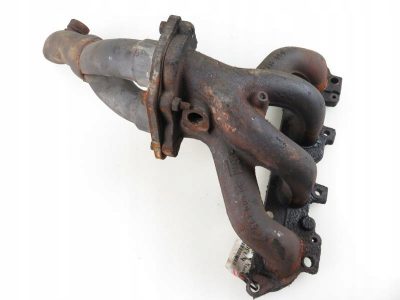
Exhaust manifold VAZ-2114
Its main task is to collect frazzle gases and distribute them into the exhaust pipe of the muffler.
Replacing or dismantling the VAZ-2114 exhaust manifold is necessary in such cases:
- Mechanical harm to the collector.
- Warpage and loss of tightness at the junction with the cylinder caput.
- Exhaustion of the gasket between the head and the manifold.
- Cracking due to engine overheating.
- Replacing the collector with a device of a unlike configuration, adjusted to a more severe operating style.
In the event that we are not going to participate in loftier-speed races for the prize of the head of the regional traffic police, replacement or dismantling of the collector may be necessary in a number of cases.
Dismantling tools and materials
There are a number of symptoms that will tell you what you need to ready for removing the exhaust manifold:
- increased racket level in the engine compartment, the engine emits a feature, loud sound in any operating modes;
- flue gas breakthrough in the engine compartment and sometimes in the salon;
- decrease in engine ability due to the mismatch of the exhaust holes in the head of the cake and in the manifold.
Many decide to replace the standard collector with a "tuning" one made of stainless steel and having a different configuration, thereby wishing to increase the engine power, reduce the resistance that the standard collector has to the frazzle gases. As a rule, the most common reason for dismantling the associates is the burnout of the gasket..
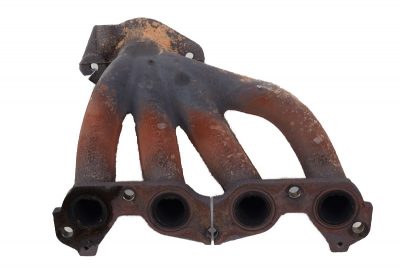
Exhaust manifold gasket
The manifold gasket on the VAZ-2114 is made of extruded reinforced asbestos and is designed to ensure the tightness of the connection between the block head and the manifold flanges. Asbestos is used to right the coefficient of thermal expansion of the aluminum alloy from which the head is bandage and the cast fe from which the collector is bandage. At loftier speeds and under continuous loads, the gasket may burn out. Then its replacement and collector dismantling are inevitable.
To dismantle the collector, you will need a standard set of tools, a set up of heads with extensions, penetrating WD-40 grease or its equivalent. In the event of a stud break, a stud extractor, drill, drills and a set of taps will come in handy. A day or two before dismantling the collector, it is worth moistening all the fasteners several times, this volition greatly simplify the removal process.
Manifold Dismantling Procedure - Step-by-Step Instructions
The dismantling process itself is not so difficult, access to some nuts is difficult, so information technology is appropriate to carry out piece of work on a lift or on an inspection pit. The algorithm of actions for the injection VAZ-2114 in this example looks like this:
- Nosotros remove the negative terminal from the battery or turn off the main switch.
Remove the terminal from the battery
- We drain the antifreeze from the system. This point should non exist neglected, despite the fact that the establish does not oblige to costless the cooling organisation from liquid.
We drain the coolant from the arrangement
- We plow off the pipes of the fuel lines.
Removing the fuel pipes
- We observe the throttle position sensor, idle speed sensor and remove the wires from them.
Disable the throttle position sensor
- Remove the crankcase ventilation hoses, the hose from the vacuum restriction booster.
Nosotros unscrew the pipes
- Dismantle the receiver, disconnect the injector wires and remove the fuel runway associates.
Disconnect the fuel rail electrical connector Dismantle the fuel rail - We become full access to the collector. Dismantle the thermal reflective screen.
Removing the thermal screen
- We unscrew the exhaust pipe of the muffler from the manifold.
Disconnect the exhaust pipe from the manifold
- We unscrew the collector mounting nuts from the studs in the cake head.
We dismantle the exhaust manifold mounts
- Nosotros dismantle the collector.
Removing the exhaust manifold
Replacing gaskets and installing a manifold
After dismantling the manifold, it is rarely possible to remove the gasket intact. She changes anyway, but on the mating plane from the side of the head and from the side of the collector, parts of the destroyed gasket volition certainly remain. They must exist advisedly removed.
Modify the collector gasket
To do this, you tin can utilise a special spray that softens the remnants of the gasket, yous tin gently remove them with a blade. In this instance, the plane must not be damaged, otherwise the tightness of the connectedness will be broken.
Likewise when installing new exhaust manifold gaskets, it is not recommended to employ sealants... They tin be of different qualities, they can course particles during crimping that fall into the crankcase, which is highly undesirable.
In custody
After installing new gaskets (they are different for an 8-valve engine and for a 16-valve one) and fixing the manifold, it is worth making sure that the unit does not come into contact with the wiring, hoses and does non bear on the stabilizer. Successful work to all!
A source: http://carfrance.ru/zamena-i-snyatie-vypusknogo-kollektora-vaz-2114-inzhektor/
How to remove the exhaust manifold? we do information technology in iii steps - prepare the auto!
The exhaust system of a VAZ-2114 car with an injection engine is not particularly difficult, notwithstanding, sometimes you lot have to spend enough fourth dimension, and maybe money (if you carry out work at a service station) to bring information technology back to normal. Today we will deal with the VAZ-2114 exhaust manifold, with the features of its dismantling and installation.
How to remove the frazzle manifold VAZ 2109 Injector ~ VESKO-TRANS.RU
The exhaust manifold is a component of the exhaust system of accounting programs, which makes the process of removing frazzle gases from the cylinders of the unit of measurement into the frazzle pipe.
If the collector malfunctions, the culprit is both the element itself and its gasket. Changing the VK (exhaust manifold) gasket is a common effect when repairing a VAZ 2109.
In lodge to change the collector or its gasket, in whatever case, you will have to dismantle the VC. But until you lot go to the chemical element you are looking for, y'all volition first need to go through some preliminary stages. More specifically, tighten the fasteners, and and then remove the air filter and carburetor if the 1st step does non help.
Your deeds
Often, weakened collector attachments became a prerequisite for the ingress of contaminants, due to which the performance of the exhaust system was impaired. In that example, the tightening did not give any result, and then the gasket was definitely burned out or the collector itself was damaged, which is the least possible
Removing the air filter
- If the engine is injector, to remove the air filter, you will need to unscrew the four fastening screws of the filter housing cover. The filter itself is located under the comprehend. If yous take difficulty lifting the encompass, disconnect the MAF sensor, remove the filter device.
- If you lot have a carburetor under the hood, then the filter with the housing volition exist held past 3 latches. At that place is a spiral in the center of the atomic number 26 cover, which is ofttimes unscrewed past paw. After removing information technology, y'all tin lift the cover without whatsoever issues. There is a filter nether information technology, which should be removed carefully. Study his condition carefully. If the filter has been operating for quite a long time, it is recommended to replace information technology during the reassembly.
Dismantle the carburetor in the following order:
- Disconnect the antifreeze hose from the plumbing fixtures to the engine starting device. For this purpose, the clamps are unscrewed to you;
- Be sure to bleed the coolant into the prepared container;
- Disconnect the front end pipe that goes from the exhaust manifold and BC bracket;
- Disconnect the throttle cable bracket. To do this, y'all must remove one end of the leap from the damper control rod, and and then remove the entire jump. Now loosen the nut on the subclass, which will allow y'all to remove the cablevision from the mesh;
- Disconnect the EPHX sensor from the power plug;
- Disconnect the vacuum pipage and a pair of hoses from the carburetor heating block;
- Remove the hose of the engine crankcase ventilation;
- Remove the four retaining nuts property the carburetor and intake manifold;
- Remove the carburetor carefully without jerking. It must be evenly removed from the studs.
Run into also: How to Remove the Rear Seat Back of the Daewoo Nexia
Now information technology's fourth dimension to remove the intake and exhaust manifolds. Having dismantled them, you lot can easily realize how you can go by with changing the gasket, or you will need to completely change the collectors themselves.
The gasket is a consumable, the purchase of which volition cost y'all almost 50-250 rubles, starting from the manufacturer and the region. Services for replacing a 100 gasket cost more than 1500 rubles. Add to that the price of a loftier quality pad and you go a lot. Y'all volition avoid such costs if our client has to do information technology on his ain.
By removing the air filter and carburetor, you gain access to the intake manifold.
To dismantle it, you will need a certain set of tools:
- Ratchet with a head for 10;
- Vorotok;
- Ratchet;
- Deepest head 13;
- Ordinary head thirteen;
- Open up-end wrench for 13.
When our client is ready, nosotros get to work.
- Unscrew a couple of securing nuts to fold back the pad located under the carburetor.
- Disconnect the hoses that are connected to the intake manifold.
- Remove the half dozen retaining nuts that are located on the intake manifold.
- Remove the manifold itself from the studs. To do this, simply swing the knot to the sides. Often it sticks to the gasket, which is why tasks appear with the removal.
- Audit the condition of the unit. If in that location is damage, the collector is replaced.
- If the problem lies solely in the gasket, set the inlet to the side for now and showtime removing the graduate.
To dismantle a graduate, you will need:
- Ratchet;
- Open-cease wrench for xiii;
- Box key for 13;
- Deepest head 13.
Remains ready for our client? Then let'due south get started.
- Unscrew the four front exhaust pipage retaining basics from our exhaust manifold.
- Pull the so-called trousers from the hairpins and take them to the side. Now you can unscrew three more VK fastening nuts.
- Gently, without sudden movements and jerks, pull the graduate off the pins.
- Often, during the dismantling of this unit, the collector or its fastening nuts stick to the seats. To warn this, treat the node in advance with the WD40 tool, allow it react, after that at that place will be no problems with dismantling work.
- If in the process of removing the pins bankrupt off, y'all will need to drill out an old element, make the newest thread and install a fresh pivot.
Encounter Likewise: How To Cheque The Oil Level In A Ford Box
Well, the check showed that the burned-out gasket was to blame. Therefore, only it will have to be changed.
VAZ 21099 troit and growls
Equally abrasive as it may sound, in order to get to the usual gasket, it was necessary to remove the air filter, carburetor, exhaust, intake manifolds. But y'all tin't do without information technology.
In lodge to replace an old gasket that has worked out its professionalism, you volition demand:
- Remove the erstwhile gasket. There are variations hither to expect certain difficulties, since almost likely the gasket has go attached to it properly, it is burnt to the cylinder caput;
- Arm yourself with a narrow screwdriver, sharpened knives, droplets solvents;
- Spray the surfaces first, then let it react. It'south better not to rush to make your task easier;
- When the production works, starting time evenly removing the old gasket from the block surface;
- And remove carbon deposits from the cylinder block mating surface. Here you volition demand not an aerosol, but real sandpaper. Do not utilise coarse grained sheets;
- Install the latest gasket for the frazzle and intake manifolds of your VAZ 2109;
- The associates of the unit is carried out in reverse order. In other words, at first, both collectors are installed in place, then the carburetor, the air filter are returned to their "homeland", the fasteners are tightened equally needed and the event of the work done is checked;
- They are appreciated by women, call up about the coolant drained in the offset steps. When, a good reason to change it to the freshest.
Installing the latest gasket
HOW to install the frazzle and intake manifolds, and the injectors of the internal combustion engine VAZ 2111 eight cl! In detail
Information technology is in your ability to provide the newest gasket for several years of service. For this purpose, before installation, treat the gaskets on both sides with graphite grease. So you increase the resistance of the product to temperature extremes that it oftentimes has to face. Likewise, glaze the cylinder head studs with graphite grease for the same purpose.
A source: https://vesko-trans.ru/kak-snjat-vypusknoj-kollektor-vaz-2109-inzhektor/
Exhaust manifold, clarification of how to remove and install, supercede the gasket and repair, how to weld a crack on a burst manifold?
cord (10) "error stat"
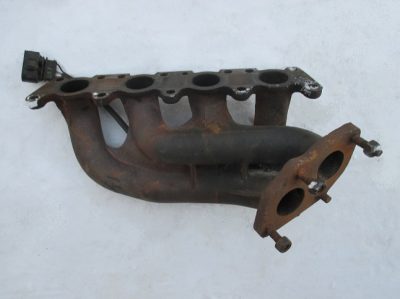
The exhaust manifold is the first unit of the vehicle'southward exhaust system. Structurally, these are several channels, combined into one common channel, which transfers exhaust gases farther along the exhaust tract. Frazzle manifolds are installed on all types of internal combustion engines, regardless of their brand or purpose. Exhaust manifolds are required to collect and evacuate frazzle gases.
Exhaust manifold layout
A properly designed and matched manifold contributes to more efficient cylinder ventilation, which means more optimal filling with the air-fuel mixture. A similar consequence is achieved due to the movement of exhaust waves within the manifold channels.
The principle of operation of the exhaust manifold
Before the exhaust stroke, the exhaust gases are under high pressure level in the cylinder. Afterward opening the exhaust valve, a pressure level driblet occurs, the exhaust gases blitz into the exhaust manifold (where the pressure is much lower).
In this case, the piston begins to motion upwardly, pushing the contents of the combustion sleeping accommodation into the exhaust system. Part of the gases goes further forth the frazzle tract, part is reflected and tends to neighboring cylinders. Such movements of frazzle gases are usually called wave.
A positive side effect is the discharge of the medium in the frazzle manifold after the passage of such a wave.
The complex operation of the intake manifold, the gas distribution mechanism and the exhaust manifold provides additional purging of the combustion chamber. The thing is that the exhaust valve is e'er "lagging" in closing (during the start of the intake stroke, the exhaust is yet open up).
The accumulated force per unit area of the air-fuel mixture in the intake manifold under certain conditions is higher than the pressure level in the exhaust manifold. A sharp pressure drop occurs, the cylinder is additionally purged from the exhaust gases, filled with a fresh portion of the air-fuel mixture.
The issue is closed.
Types of exhaust manifolds
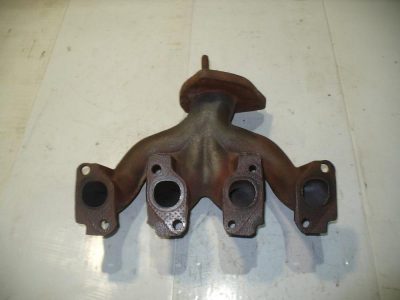
All exhaust manifolds tin can be divided into one-piece and tubular. A one-slice exhaust manifold is normally a single piece cast from cast atomic number 26. The tubular manifold is fabricated of welded pipes, steel and flanged connections for mating to the engine cake.
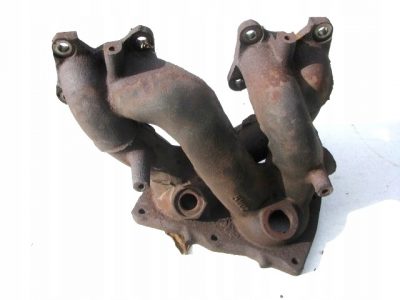
Cast iron frazzle manifolds
Types of manifold pipe layout
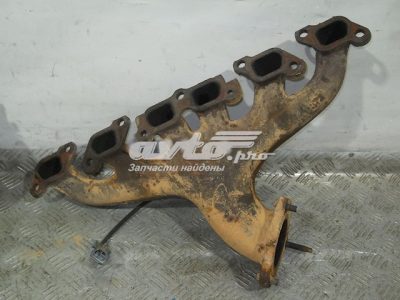
Exhaust manifold with 4-1 layout. It consists of four pipes-channels connected into i common pipe (the number of channels corresponds to the number of cylinders).
Exhaust manifold 4-2-one. In such collectors, the pipes first connect the cylinders operating in pairs (at ane stroke), so go into one common pipe.
An of import parameter of exhaust manifolds is their length and, accordingly, their book. If the length of the exhaust channels is insufficient, the free energy of the exhaust gas flows volition be enough to get into the channels of adjacent cylinders and negatively impact their functioning.
In such collectors, the wave movements of gases are poorly synchronized with the operation of the engine. At the same time, on engines with a small long exhaust manifold, equally a rule, "narrow" valve timing with a relatively small volume of exhaust gases.
The production of collectors with a brusque length is justified past the low cost.
Jumpsuit manifold 4-i with short outlet lengths
Long exhaust manifolds are used on powerful and efficient engines. In such collectors, part of the volume of frazzle gases tends forth a common pipe to the adjacent nodes of the frazzle arrangement, and function is "reflected" to the rest of the cylinders. It volition take a much longer time for the wave to pass from one cylinder to another, which creates definitely better conditions for vacuum and purge.
Exhaust system kit six-2-1
Frazzle manifold with equal length of outlet pipes (equal length). Equally a dominion, information technology is installed on powerful sports cars.
Sophisticated equal length frazzle manifold,
made of pipes
Equal length manifold allows compatible frazzle in all cylinders and better synchronization of the engine with the exhaust arrangement. Tuning of the exhaust tract can be done on any engine. This is guaranteed to bring an boosted iii-5% power.
Exercise not forget that an increase in the length of the exhaust manifold volition also lead to an increment in the temperature in the engine compartment.
The temperature problem is solved by installing thermal insulation. To exercise this, you tin use a metallic casing or a special non-combustible fabric.
At that place are models of collectors in which ceramic spraying is used as thermal insulation.
Exhaust manifold cover Manifold channels insulated with special cloth Ceramic-coated exhaust manifold and turbine volute
Frazzle Manifolds Performance
Typical malfunctions of exhaust manifolds:
- Damage to the gasket between the manifold and the cylinder block. A gasket made of paronite, metal or composite materials is used to seal the "cylinder block - exhaust manifold" junction. Under the influence of pressure level and high temperatures, the gasket is destroyed over time, which leads to a violation of the tightness. Office of the gases breaks through directly into the atmosphere, the engine is unstable.
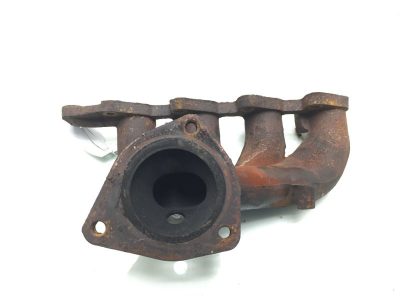
- Deformation of the manifold pipe flange. The frazzle manifold temperature can reach 900 ° C. If the temperature conditions are violated, the collector is subject field to deformation, which can cause damage to the threaded connections of the collector fasteners. For example, the exhaust manifold bolts may simply "rip" (damage the threads). Such consequences are caused by a violation of the engine operating way or excessive tuning.
- Physical harm, leakage. The exhaust manifold operates in an aggressive environment, therefore, over time and kilometers traveled, cast-iron manifolds burst, and tubular steel ones can burn out. This has a negative effect on engine performance. Even a pocket-size crack in the exhaust manifold will cause the frazzle system to malfunction. If the crevice is insignificant, the problem may not manifest itself for some time. Symptoms may exist:
- errors of the engine control unit;
- unstable engine speed - smooth drops of 300-500 units;
- engine sound with unadjusted ignition;
- in such cases, a severely burnt pipe is adamant.
- Chock-full frazzle ducts. Carbon deposits and rust grade on the walls of the exhaust manifolds. Such deposits can atomic number 82 to reduced channel clearance and poor engine performance.
Tubular exhaust manifold with deformed "flange" docking plate
In order to avert the to a higher place malfunctions, it should exist remembered that the exhaust manifold is an engine assembly that should exist inspected about in the outset place during routine maintenance.
Tubular exhaust manifold with a set of gaskets and fasteners
Repair of exhaust manifolds
Frazzle manifold problems tin can occur even on relatively young cars. Over fourth dimension, many car owners inquire themselves questions: what to exercise if the exhaust manifold bursts, how to remove the exhaust manifold, how much a new exhaust manifold can cost, change or repair the frazzle manifold elements.
Of course, the easiest way to solve bug is to contact a service centre. The cost of parts and services volition vary depending on the make of the vehicle and its uniqueness. For instance, a new exhaust manifold can cost anywhere from a few hundred to several m dollars.
Merely the repair of the exhaust manifold can as well be mastered past an ordinary motorist. All you need is a standard set of tools and equipment.
Exhaust manifold replacement
In the issue that the exhaust manifold is significantly burned out or has a severely disturbed geometry, information technology must be replaced. For this:
- waiting for the engine and manifold to cool downwards to normal temperature for repair;
- we remove all elements that tin interfere with piece of work (engine protection, collector protection or other components);
- nosotros untwist the threaded connections of the fasteners to the block and the downpipe of the exhaust arrangement;
- we remove the exhaust manifold;
- further - replacement of the exhaust manifold gasket;
- nosotros mount a new collector with fasteners, we tighten it;
- we install all the dismantled elements in the reverse society, tighten the threaded connections.
Most often, only the replacement of the exhaust manifold gasket is required.
Exhaust manifold gasket
If the exhaust manifold bursts, or even if its co-operative piping is completely cleaved off, do not rush to purchase a new one. In many services, welding of exhaust manifolds is practiced. Bandage iron is cooked with special electrodes or argon-arc welding. Steel tubular collectors are also weldable. Such work is not within the ability of a beginner; it is meliorate to turn to specialists.
Bursting cast iron exhaust manifold to Bursting frazzle manifold
Exhaust manifolds are physically necessary for the counterbalanced operation of the internal combustion engine, therefore modern engines are designed taking into account the complex operation of units and mechanisms. Tuning the same exhaust systems gives a quite tangible increase in power, and with the right approach, it will not affect the performance of the car as a whole.
If you accept any questions - leave them in the comments below the article. We or our visitors volition be happy to reply them.
A source: https://SwapMotor.ru/vyhlopnaya-sistema/vypusknoj-kollektor.html
Repair and replacement of the exhaust manifold
Equally an important part of the frazzle system in cars, the engine exhaust manifold needs abiding monitoring and repair, and sometimes even consummate replacement. As part of the exhaust system, it is directly connected to the engine and belongs to the zipper.
Collector repair
First you lot need to remove the protection located near the ability unit of measurement. It is fastened with 3 nuts, which are removed during operation. Before removing the protection, yous should make sure that in that location are no various contaminants on it, and if found, make clean it. When unscrewing the fasteners on which the protection is held, they must be lubricated with oil, which will greatly facilitate the procedure. After that, y'all tin can start restoring the part.
Cases where the replacement of the exhaust manifold gasket is required are extremely rare. Only, if this happens, you should brand sure that there are no dirt or other foreign objects at the location of the gasket.
When access to the corrector is open, then it is worth cleaning all the bolts and the surface in society to facilitate the removal process. Before loosening the nuts, it would not hurt to lubricate them with oil. Information technology is much easier to do information technology from the inspection pit.
Replacing the exhaust manifold is a painstaking piece of work that requires accuracy and utmost intendance. If a lambda probe is attached to such a spare part, it should be disconnected from the connector.
After that, yous can remove the intake pipes, which are best unscrewed from higher up, equally this volition be more convenient and, accordingly, applied. Carrying out work from below volition require the emptying of protection. After the intake pipe is removed, then it must exist plugged with something. It can exist either a regular rag or other elastic materials. An important point will be that when unscrewing the nuts on the manifold, information technology is imperative to remove the antifreeze pressure and too bleed it.
Parts Removal Procedure
How to remove the exhaust manifold? After the fasteners are removed, with some effort, you can remove the outlet part. The gasket changes anyhow. If in that location are studs that only jumped out or broke due to temperature differences, then they must be changed. How can this be done? It is worth drilling them with a side drill. First, you need to brand a notch with a thin drill, then a larger one.
Having drilled a hole, the rest of the stud just needs to be unscrewed. Afterward that, the hole must be cleaned, thoroughly dried, then that when installing a new stud, unpleasant situations practice not arise. New fasteners are installed with a new thread lock in social club to strengthen it, securely fixing information technology. Afterwards this process, you can easily install a new or old cleaned manifold. The part is installed on the same pins and basics.
After the end of the procedure, all the spare parts that were involved are installed, and the work can exist considered finished.
Сonclusion
Removing the exhaust manifold of the ability unit requires care and precision, the procedure tin can take from 30 minutes. When replacing a office, accurateness is important in all processes that require special care. The fact is that the almost crucial moment is the removal of the retainers.
When removing these parts, they are pre-cleaned, taking into account the moment that there are studs inside the nuts, which must exist installed correctly at the cease of the process. At that place are situations when studs and even basics fly out while driving. When the engine is running, the collector temperature rises, which leads to such consequences.
The bottom mount must be removed with extreme care, given that there are parts nearby that can be damaged. If y'all do everything correctly, yous can get the consequence of a complete replacement of the collector, besides as the gasket.
Write if this commodity was helpful to y'all.
A source: https://CarExtra.ru/remont/remont-i-zamena-vyipusknogo-kollektora.html
Exhaust manifold and its replacement
The combustion products of the air-fuel mixture leave the cylinder head (cylinder head) and enter the exhaust manifold. The exhaust manifold directs gases from all cylinders into the exhaust pipe. After reading the commodity, you will find out what affects the state of the collector and learn how to change it.
What affects the condition of the collector
The temperature of gases leaving the cylinder head exceeds 600 degrees.
If the engine is operating at maximum power, the ignition timing is incorrectly set up, or the fuel system is preparing a mixture that is also rich or as well lean, then the temperature of the frazzle gases exceeds 1500 degrees.
Considering of this, the exhaust manifold heats up to a temperature of 200-300 degrees. In the maximum power style, with improper operation of the ignition systems or fuel preparation, its temperature can reach 600 degrees, due to which the collector acquires a dull cherry color.
If all engine systems are working properly, the exhaust manifold will have a service life of over 40 years. The exceptions are racing cars and cars, the engine of which is constantly running at maximum power. The passage of incandescent gases leads to a gradual burnout of the metal. The burnout rate is influenced by:
- temperature;
- open up flame (when the air-fuel mixture burns out in the manifold);
- oxygen content in the exhaust.
The exhaust manifold is fabricated of cast atomic number 26, the base of which is atomic number 26 and carbon. The higher the collector temperature, the more the atomic number 26 reacts with oxygen and atmospheric moisture. Over time, this leads to the fact that the metal of the collector burns out and the exhaust gases, instead of the frazzle pipage or goad, enter the engine compartment.
Equally a result, the air in it heats up, which leads to an increase in engine temperature, overheating and other problems. Office of the smoke from the engine compartment enters the passenger compartment, negatively affecting the well-beingness of the driver and passengers.
If, during a strong heating of the collector, you lot collection through a puddle and water got on the bandage iron, then the product is likely to be covered with cracks and will require replacement.
Replacing the collector with your own hands +
If the collector is burnt out or covered with cracks, and then it is pointless to attempt to weld it. The cost of such work will be several times higher than the installation of a new collector in the workshop. To supervene upon the collector you lot will need:
- jack;
- a basin for draining the coolant;
- a ready of open-cease, ring and socket wrenches;
- ratchet wrench with an extension and a set up of nozzles of diverse lengths;
- flat and Phillips screwdrivers;
- new collector;
- new manifold and cylinder head gasket;
- new gasket of the manifold and the downpipe of the exhaust organization.
Replace the collector every bit follows:
- Read carefully the article - safety precautions for car repair and maintenance.
- Disconnect the bombardment.
- Drain the coolant. This process is described in detail in the article practise-it-yourself coolant replacement.
- Remove the air filter, the injector receiver (this operation is not necessary on carburetor vehicles) and the temperature shield.
- Remove the bolts and nuts from the exhaust manifold flanges and the frazzle downpipe.
- Remove the nuts or bolts that secure the manifold to the cylinder caput and remove the manifold. On eight valve engines, these bolts or basics hold the intake and exhaust manifolds in place. Therefore, it is necessary to unscrew all the nuts, then dismantle the intake and only so remove the frazzle manifold.
- Clean the airplane of the cylinder caput from traces of the old gasket.
- If necessary, re-thread the holes or install new manifold studs.
- Install new gaskets.
- Install a new manifold. On eight-valve engines, an intake manifold is also installed with it.
- Install, just do not tighten, the basics or bolts that secure the manifold to the cylinder head.
- Connect the manifold to the downpipe (s) of the exhaust system by installing a new gasket, then tighten simply do not tighten their bolts and nuts.
- Tighten the nuts securing the manifold to the cylinder caput with the required force (y'all volition find it in the repair manual for your car).
- Tighten the manifold and front end pipe flange bolts and basics.
- Filter and fill the radiator with coolant.
- Connect the battery.
A source: https://VipWash.ru/vyhlopnaya-sistema/vypusknoy-kollektor-i-ego-zamena
How to remove the exhaust manifold on a Vaz 2114
Replacing the frazzle manifold and gasket on a VAZ 2114
Exhaust manifold. information technology is the unit of measurement that is responsible for driving quality, without which comfort is impossible. It is nonetheless, and there is no exhaust smell under the hood that can be pulled inward through the cabin opening. Emptying of leaks in the frazzle manifold of the VAZ 2114. Repair is needed. Fortunately, this does not happen urgently, you can prepare in advance and choose the right moment.
Frazzle manifold for VAZ 2114
Reasons for failures
The key cistron that accounts for xc% of exhaust manifold failures on VAZ 2114 vehicles is the high temperature rather than high quality materials from which the parts are fabricated. During performance, the steel is repeatedly heated and cooled, which leads to the advent of cracks on the body. This is a frequent phenomenon for VAZ cars older than seven-viii years.
Motorcar service stations offering argon welding crack welding services. Withal, for a number of reasons, this activity is useless for a car over seven years quondam.
i) Only for removing and installing the exhaust manifold will cost about 2,v grand rubles. Taking into account the work of the welder and other activities, the cost of repairs can be 4-5 thousand rubles. If yous do the job yourself, ownership a new function will be cheaper.
2) Welding, even argon, destroys the structure of the "tired" metallic. The finished item rarely lasts longer than a year, afterwards which new holes appear. The older the car. the sooner the problem returns and the collector must be removed once more.
If the car is over eight years old and there are bug with cracks in the manifold, the part must be removed and replaced with a new 1.
Symptoms of malfunctions
Exhaust manifold
One of the main signs of leaks in the organisation is the "sporty" growling audio when the engine speed is adjusted. This could be a symptom of various malfunctions in the exhaust system. To bank check, it is ameliorate to take an assistant and get to a garage with a pit or to an overpass. More often than not, you tin make up one's mind if the trouble is with the muffler, resonator, or outlet.
Vesture and tear tin can occur during installation. Open the hood and showtime the motorcar. white or gray smoke rising from the manifold during warm-upwardly indicates a leak for this reason. Owners of VAZ cars commonly face this trouble every 3-4 years. Earlier using substandard spare parts. The determination could be the industry of a steel gasket to order. He can serve equally a collector in full general.
Removing the catalyst VAZ 2114,15,13
Give thanks y'all then much for watching my videos, tell your friends, go out comments, subscribe.
Replacing the gasket under the collector 2108, viburnum, grant
Stud replacement process graduation path, filmed on the phone and whipped up.
The service specialists who attract customers honey to tell scary stories almost the explosion of the exhaust manifold on VAZ 2114 cars due to cracks. In fact, this is nothing more than a myth. Simply the real bug are just every bit serious, so don't postpone repairs in a distant box.
A cracked exhaust manifold or a worn gasket tin can contaminate the engine.
1) At that place is a lambda probe in the exhaust manifold, which affects the operation of the injection organisation. Strong intake air disrupts the mass oxygen content in the exhaust gases, lambda improves the quality of the mixture, causing breakdown, uneven idling, loss of power, "black" plugs.
two) Another role. crankcase ventilation. Violation of air circulation leads to a malfunction of the gas distribution mechanism, increased valve wear, the formation of carbon deposits on the pistons and other "joys".
If at that place is increased dissonance and unpleasant odors when combining the engine with muddy work, the car needs urgent repair.
We independently remove the exhaust manifold of the Volkswagen Polo sedan
An unconscious understanding of the principle past which a car starts to movement begins to form already in childhood. Every boy drew a car at to the lowest degree once in his babyhood.
The most important thing was to show the outlines of the trunk, doors, wheels in the cartoon. Some of them managed to paint on the rear-view mirrors. But the most important element was considered to be the exhaust pipe, from which, as a dominion, clouds of grey smoke escaped.
And then information technology was possible to sympathise that the car was not just standing, but was driving along the road.
In all modern cars, a collector is responsible for the removal of exhaust gases into the co-operative pipe. It is a technical appendage of the power plant, which controls the supply of the fuel-air mixture to the engine cylinders, and also unquestioningly removes the exhaust gases from the system. Accordingly, two devices are provided for two purposes - intake and exhaust manifolds.
The purpose of the beginning is to evenly distribute the hot mixture over the cylinders. A blockage in one of the pipes tin can atomic number 82 to an imbalance in the injection, which will cause the engine to malfunction and reduce its performance.
In addition, due to the vacuum that is created in the system, control over other components of the automobile is carried out - the hydraulic brake booster, cruise control, ability windows, etc. The combustion procedure of crankcase gases arising from movement takes place in the intake manifold chamber. The kickoff intake manifolds were made of aluminum or cast atomic number 26.
Today, devices are fabricated of plastic, which is more resistant to temperature, which makes information technology possible to fully fill the cylinders of the ability unit and stabilize its performance.
Exhaust manifold device
The exhaust manifold is an element of the car's exhaust system through which the products of internal combustion are discharged. To ensure that the fuel-air mixture enters the cylinders faster, the pipes and chambers of the exhaust manifold are purged. Two types of devices are installed on mod cars - jumpsuit and tubular collectors.
The first samples are cast iron products with short tubes combined into ane common bedchamber. The removal of exhaust gases is slower than in tubular specimens, just the low cost of the devices compensates for this disadvantage.
Tubular exhaust manifolds are more expensive than solid exhaust manifolds, only the steel structure of the internal combustion engine element is much more constructive in coping with the "extradition" of combustion products.
READ More than: Changing the pump of the Volkswagen Polo
The Kaluga Car Institute installs tubular samples on the Polo sedan. The most important "neighbor" of the exhaust manifold is the catalytic converter. It is designed to reduce the toxicity of exhaust gases. It is considered "main" because it is not inexpensive on the automotive market. The original part, together with the manifold for the Polo sedan, costs well over 50 thou rubles. Preserving the environment is expensive.
A heat shield is located betwixt the tubes and the combustion sleeping accommodation on the outer surface, which is attached to the device with two flat head bolts. He plays the role of a savior, protecting the device from cracks in the instance and moisture ingress, which in the worst case can provoke a breakdown of the device. The original with the article number 036 253 041 CR volition cost the owners of the Polo sedan under 2000 rubles.
There is a special gasket 03C 253 039 H in front of the pipes connected to the "engine" cylinders. For a German sedan, the toll tag is set in the range of 300-350 rubles. The gasket, along with the unabridged weight of the device, is held by 9 hex nuts. Anyhow you don't need to purchase, of course, and so if you decide to supplant the device, then you lot need to purchase samples with articles Due north 908 946 01 or WHT 000 001 N.
It is more than assisting to buy an exhaust manifold for a German sedan as a kit than to get together parts separately. The unit in online stores costs about 2300 rubles. (naturally without a neutralizer).
Wear and tear of parts is a common affair in cars. With the frazzle manifold - the same problem. Russian roads oftentimes become an insurmountable obstacle for these far from fragile devices. Cracks, chips and other deformations are the physical side of the coin, which in most cases tin exist accompanied by unpleasant pops from under the auto bottom.
Many owners of the Polo sedan solve this problem past welding: they remove the part from the car and weld the resulting hole. But, as a dominion, in a High german sedan, the problem is not solved in this way, since literally in a few months the "seam" begins to diverge. Therefore, if a crack forms on the case, it is best to replace the device with a new copy.
READ MORE: How to modify the air filter for a Volkswagen Polo sedan
Another problem is associated with a clogged exhaust arrangement. The inability to efficiently and efficiently remove combustion products resulting from the formation of carbon deposits on the inner surfaces of the pipes and the chamber leads to the devastation of the exhaust organisation. Pops escaping from the exhaust pipe are clear prove of a malfunction in the organization.
Excessive contamination of the entire structure can exist caused by diverse reasons. Most often, the automobile begins to "sneeze", spitting out pops into the atmosphere, due to the use of poor-quality leaded gasoline, from which no motorist is immune. Filling with loftier sulfur and phosphorus engine oil from unverified manufacturers tin can besides cause nasty pops.
Collector Dismantling Guide
In both cases - whether information technology is a breakdown or an ordinary blockage - the dismantling of the exhaust manifold is required. On the Polo sedan, for the procedure, y'all will demand keys for "10", "12", "xiv" and "22", a Torx T14 and T30 head, pliers and most a couple of hours of gratis fourth dimension.
Sequence of deportment for removing the catalytic manifold:
- We remove the negative terminal from the bombardment.
- Nosotros become downward to the car and unscrew the engine protection.
- We unscrew the bolts of the lower part of the manifold.
- We go upstairs and dismantle the oxygen concentration sensor on the manifold, and also unscrew the thermal protection bolts.
- We remove the protection.
- We unscrew the bolts that connect the manifold to the cylinder block.
- We dismantle the device and the gasket.
If the exhaust manifold is damaged, the role should be replaced. Information technology is likewise recommended to replace all gaskets with each disassembly of the unit of measurement with new ones, regardless of their caste of wear.
Despite the fact that the process of removing the collector is a rather monotonous procedure, it is not worth postponing the procedure indefinitely. At to the lowest degree once every ii years, you need to strength yourself to cheque the device for defects. Otherwise, i fine twenty-four hour period the exhaust pipage of your wonderful "Polik" will turn into a real firecracker, vehement the air around with deafening claps. Not New year'due south at all.
READ MORE: How to change antifreeze for a Volkswagen Polo sedan
A source: http://PoloAvto.ru/to-i-remont/dvigatel/vypusknoj-kollektor-polo-sedan.html
How to supplant the exhaust manifold gasket
The exhaust manifold gasket is responsible for the tightness of the joint between the frazzle manifold and the cylinder head. The role ensures the normal operation of the VC, and, as a result, the prophylactic of the machine.
Exhaust manifold functions
It consists of several, turning into one, pipes, merely has dissimilar mountings and configurations for different engines. Loftier-carbon bandage iron, stainless steel and titanium are used for the product of VC, sometimes coated with ceramics / chromium.
The task of the "spider" (every bit the exhaust manifold is called in the Russia) is to transfer combustion products collected from all cylinders to the intake pipe. The gases from the VC go to the catalyst or directly to the exhaust piping and then to the muffler. The frazzle manifold is attached to the engine, or rather to the cylinder caput (cylinder head), sealing the joint with a special chemical element.
When replacement is required
The durability of the exhaust manifold gasket does non depend on the period of its utilise and the mileage of the car. Information technology is capable of performing the functions assigned to it for 2, 5 or 10 years, and does not utilize to the elements whose replacement occurs according to plan. The duration of its service is determined by the only factor, namely, the right operation of the engine - the fewer overloads (especially potent temperatures) and the meliorate the fuel, the less often you will have to resort to replacing the gasket.
Signs of a burnt gasket
The easiest style is for the owner of a auto with an injection engine, the performance of which is monitored by an ECU (electronic control unit). It signals a gasket malfunction to the dashboard, where the Check light comes on. This means that the lambda probe, which is unremarkably equipped with the manifold, recorded a alter in the amount of oxygen in the frazzle, informing the ECU. The engine starts to piece of work in emergency manner until the defect is eliminated.
"Symptoms" of a burnt gasket:
- the engine is unstable;
- makes an uncharacteristic sound during operation;
- the cabin smells like exhaust gases.
Attention! The fact that the frazzle manifold gasket has burned out is signaled by a recognizable chirping generated by gases that intermission through the seal. Motorists oft say that the engine chokes.
Exhaust through the ventilation and heating systems quickly penetrates into the passenger compartment, which is fraught not only with a deterioration of the microclimate, but also with negative health consequences. That is why replacing the exhaust manifold gasket becomes a necessary just necessary mensurate.
Replacing the gasket
The mark of a failed gasket is considered to be the soot that forms in the identify where the exhaust bursts out. In this case, go along to replace the unusable seal.
What is needed for repair
To replace the exhaust manifold gasket, prepare materials and tools:
- screwdrivers (slotted and Phillips);
- a sharp pocketknife or spatula (remove the used gasket);
- spanner wrenches included;
- anti-rust liquid (for example, WD-twoscore);
- a container with a broad cervix for v liters (for draining antifreeze);
- dry out rags.
ATTENTION! When replacing the manifold gasket on a VAZ 2114 (as on other models of the plant), information technology is necessary to drain the antifreeze in advance, otherwise you lot can fill the engine inlet windows.
Step by stride actions
The process of replacing the seal when it fails is uncomplicated, but has nuances for different engines. In full general terms, the algorithm for dismantling and subsequent installation of the VK gasket looks like this:
- Open the hood and remove the air intake with the carburetor, under which the manifold is located.
- Remove the thermal shield covering the VC (some older models do non accept a screen).
- Unscrew the bolts that secure the "spider" to the frazzle pipe, and so the bolts that connect to the engine block.
- Kickoff removing the exhaust manifold itself, on which the burned-out gasket sits, oft "sticking" to the VC.
- Thoroughly clean the area of the joint betwixt the cylinder head and the manifold with a spatula, removing carbon deposits and fragments of the worn gasket from the second.
- Once the expanse is shiny, coat it with graphite grease and install a new gasket.
- Apply the same grease (to prevent corrosion) on the fasteners.
Finally, render all dismantled parts to their rightful places.
Replacing the VAZ 2114 gasket
First, the engine protection is removed from the car continuing on the overpass, the antifreeze is drained before that, and so they proceed as follows:
- Remove the air filter, having thrown off the negative terminal of the bombardment before.
- The fuel pipes with the accelerator cable are asunder from the throttle.
- Disable the idle / throttle sensors.
- Disconnect the crankcase ventilation and brake booster hoses, turning off the receiver.
- Remove the latter by disconnecting the wires at the injection command unit.
- Dismantle the fuel rail without unscrewing the injectors.
- Detach the front end pipage from the VC.
- Remove the intake and frazzle manifolds in turn.
- Remove the old gasket.
- Make clean the joint between the manifold and the cylinder head with a knife.
- They put a new gasket, making a reverse installation.
- Fill in coolant.
An exhaust manifold gasket will concluding a long time if you use quality fuel and control the level of antifreeze to foreclose engine overheating. And also cheque the reliability of the articulation between the cylinder head and the VC and immediately modify the gasket, noticing its malfunction. You also demand to buy gaskets from reputable manufacturers.
A source: https://voditelauto.ru/%D0%BF%D1%lxxx%D0%Exist%D0%BA%D0%BB%D0%B0%D0%B4%D0%BA%D0%B0-%D0%B2%D1%8B%D0%BF%D1%83%D1%81%D0%BA%D0%BD%D0%BE%D0%B3%D0%Exist-%D0%BA%D0%BE%D0%BB%D0%BB%D0%B5%D0%BA%D1%82%D0%Be%D1%eighty%D0%B0/
how to remove a collector on a vaz 2114 ~ AUTOTEXNIKA.RU
page "how to remove a collector on a vaz 2114
25.04.2018
Как remove the exhaust manifold
Many owners of VAZ cars repair and service their vehicles without the help of others. 1 of the nigh common problems when operating a car in heavy modes is exhaustion of the gasket between the frazzle manifold and the cylinder head, clogging of the catalyst, deposition of combustion products on the walls of the exhaust system. All these obstacles have a negative outcome on the removal of exhaust gases from the combustion sleeping room.
The removal of gases from the combustion chamber is a fundamental point, their reverse entry into the chamber lowers the quality of the fuel-air consistency, which means that a decrease in the power of the motorcar will be observed. In addition, when the gaskets are burned out, flaming gases volition escape into the engine compartment, which tin cause a fire in the engine section.
The audio during such work will be quite sonorous and annoying to others.
Emptying of all of the above defects volition exist associated with the analysis of the frazzle gas removal system. How to remove the frazzle manifold and whether information technology can be washed in garage criteria without calling the service is of interest to many VAZ Priora owners who have not encountered similar piece of work.
Substitution exhaust manifold with his own easily, he will demand the execution of work on the removal of additional parts, later that it volition already be possible to become to the fastening parts of the frazzle system. If the repair work is not related to the burnout of the gasket, then it still needs to be changed to the newest one.
Tools
For the work, you volition demand the following tool:
- open-end or band wrench for eight, 10, thirteen.
- deepest head 13.
- cardan and extension for the head.
- ratchet.
- slotted screwdriver.
- liquid WD.
Work on removing the exhaust manifold should exist carried out on a cooled engine to avoid burns. The motorcar must exist placed above the pit so that there is open admission to the engine compartment from below. For the safety of piece of work, remove the battery concluding.
Disconnect the air pipe

Source: https://avtograf70.ru/en/remont/kak-snyat-vypusknoj-kollektor.html
Posted by: siasonviziest.blogspot.com
0 Response to "How To Repair Exhaust Manifold Gasket Leak"
Post a Comment